Sunday, February 13, 2011

February's bag!

Hi everyone!  Sorry I'm so late telling you about February's bag!  For February I made a diaper bag, because it seems like everyone I know is having a baby.  This would also be really cute as a purse too.  Here are some pictures to show you just what it looks like!
This is the front of the bag, obviously. :)  It has a strap that matches the lining fabric that comes around the bag and secures with D-Rings.
This is the back of the bag, which looks suspiciously similar to the front.
This is the bottom.  The pattern includes a piece to cute a plastic template for the base of the bag.
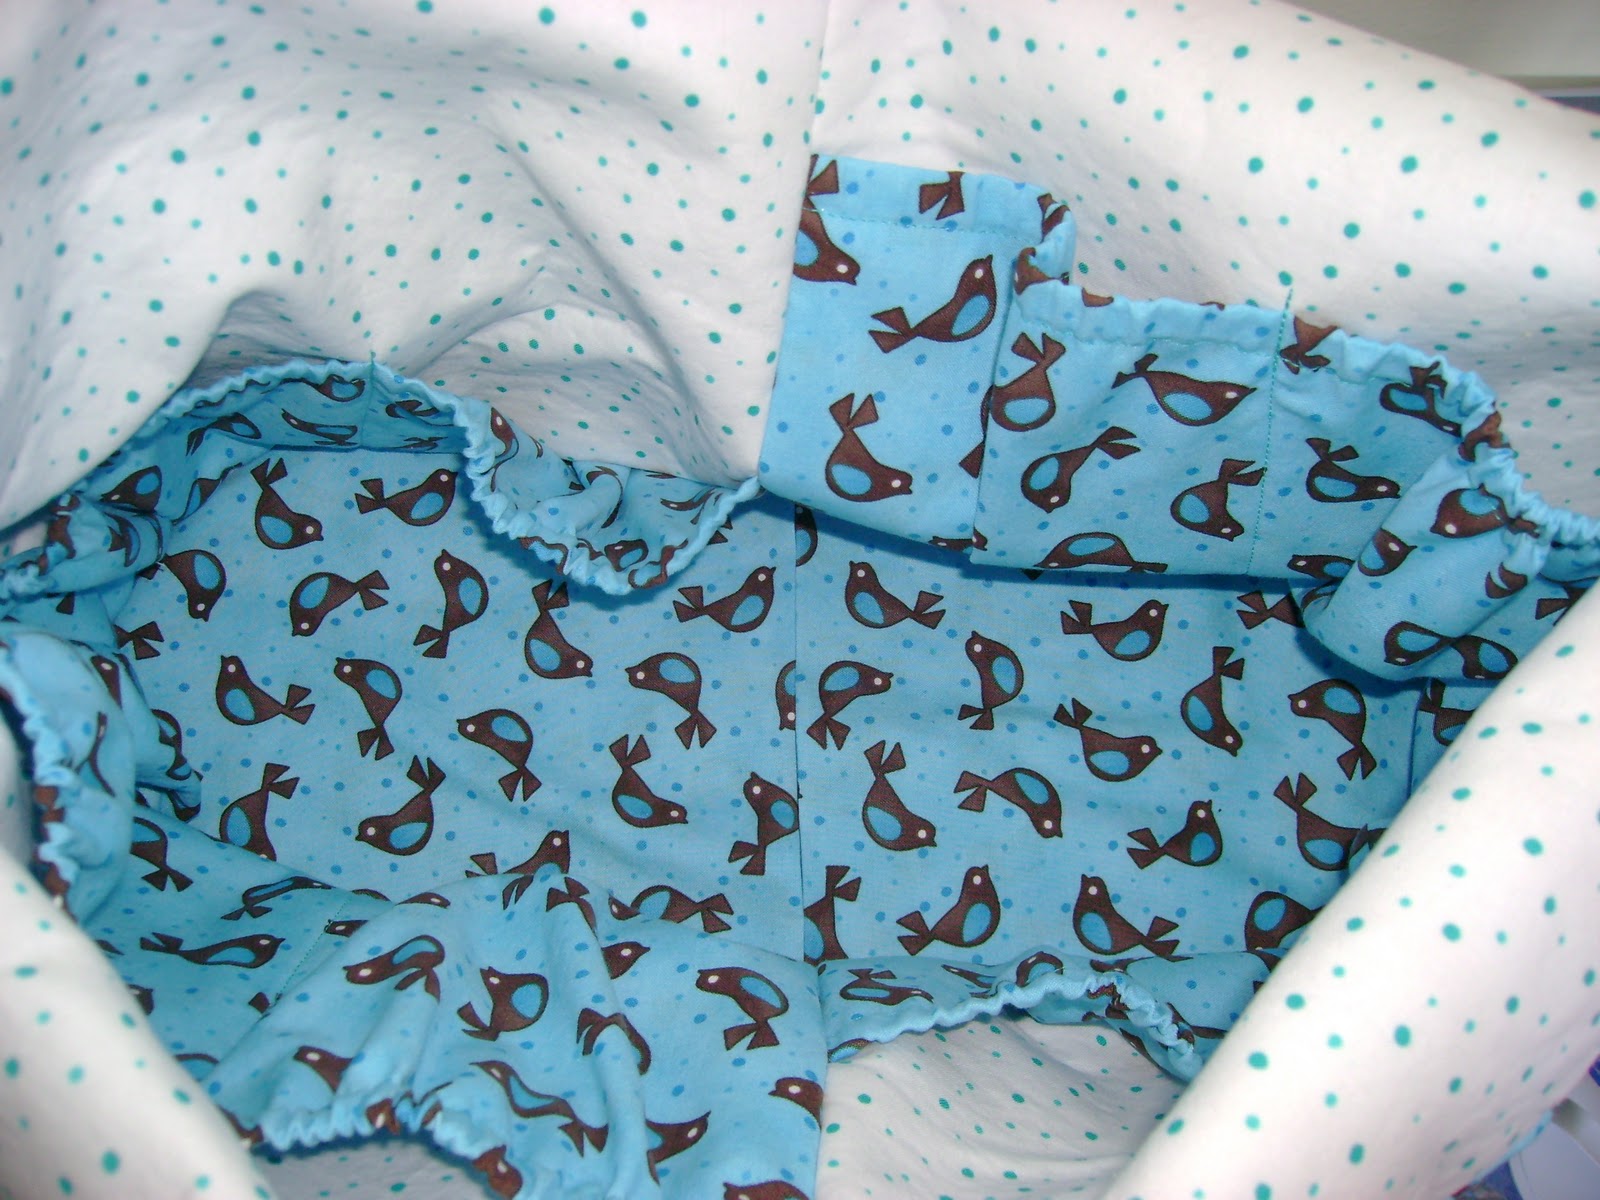
This is a sad looking picture of the inside.  There are eight pockets with elastic tops, so they will not be poochy or anything like that.  This is quite a roomy bag, I of course didn't measure mine and it's currently at the shop, so I can't measure it.  The pattern states that the bag dimensions are 14" tall, 20" lengthwise, and 9" deep.  The straps are nice and fabric-y too (is that a word?), so they are comfortable.  This pattern is done with paper pattern pieces, which Sylvia is going to give us some tips on, because Alex is not good at it. :)

We are having a class for this bag Saturday, February 19, from 10-4, and we have room for a few more people.  If we need to, we will have another class, and we will have to schedule it Saturday, March 12 (tentatively), or sometime during the week.  If you are interested, call the shop and see what's going on.  The number is (207)764-3800, or email sylvia@gardengatefabrics.com.  Thanks, see you soon!

Thursday, January 6, 2011

Introducing Miss January!

Garden Gate Fabrics is proud to present the first bag of the Bag of the Month for 2011, January!

Pattern: 4th Quarter Bag by Silk Road Creations
Fabric: Arabesque from Benartex
Kit: cost is $25, and that includes fabric to make the bag, fusible batting, hardware, pattern, and Alex's tips and tricks.
Class: A class for making this bag will be held Saturday, January 29 at 10 am.  The price for the kit and the class will be $30.  Please sign up so we can make sure we have enough materials and space.

This bag was really fun to make, and reasonably priced.  It's also a good size.  It is 9.5 inches tall without the handles, and 16 inches tall with them.  It is 9.5 inches wide as well, and 3 inches deep.  If you actually follow the pattern you might get a slightly larger bag, I had to do some fudging throughout due to lack of reading all directions first. :) It has 12 pockets on the inside, and 2 pockets on the outside.  Overall, it would make a great everyday purse.  The fusible batting that I used helps the bag to keep it's shape really well too.  Please join us in making a bag a month for 2011!  In closing, here are some gratuitous shots of the bag from other angles.


Tuesday, December 14, 2010

Is it really almost Christmas?

I spent the morning knitting, and will be spending the afternoon sewing, in an attempt to get homemade Christmas gifts done by Christmas.  There's a first time for everything, right?

Here is how the conversation in my head has been going (and yes, I do talk in my head while I'm home alone, knitting and sewing.  The cats got tired of me talking to them):
"Wow, there isn't any snow, I have lots of time to get these gifts done!  I am so ahead of schedule!"
Pause to pat self on back and slow down a little on the knitting.
Glance to the right, where there is a chalkboard reading, "11 days until Christmas!"
"GAH!" knitknitknitknitknitknitknitknitknitknit
"Wow, the sun is out!"
Slow down on knitting.
Look at chalkboard again.
"ARGH!" knitknitknitknitknitknitknit
Repeat.

This has been going on for about 5 hours now, no exaggeration.  I told someone last week that I thought I was going to get everything done for Christmas before Christmas actually got here, and now that statement is coming back to haunt me.  But really, it's December, and there is little to no snow, and it's 50 degrees outside, in northern Maine.  Can you blame me for thinking I'm way ahead of Christmas this year?

Tuesday, December 7, 2010

Fiddlehead Mittens

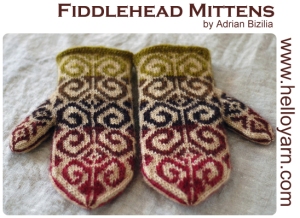
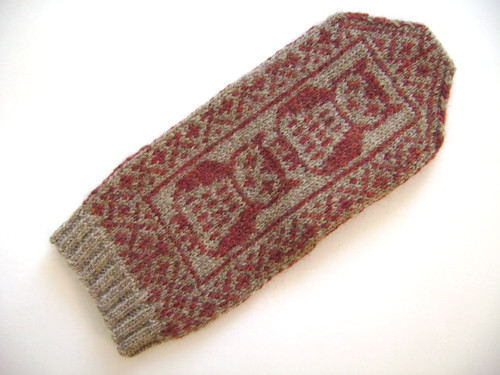
Hi everyone!  Remember when I told you all about those Fiddlehead mittens I was making for Chelsea?  Well, they are done! 

These mittens turned out SO SO great, in spite of all of my craziness.
First of all, the pattern is way terrific, and definitely worth the $5.95 I paid for it.  If you are interested in the pattern (which you should be after reading my post!), you can find it here.  I have never, that I can remember, knit a pattern without changing it at least a little bit, and this pattern I knit just as the designer said.  I did make one modification, but I regretted that afterward (and you'll read about it below).  First reason why I like them: these mittens have a gusset thumb.  Many of the colorwork mittens I've seen have afterthought or peasant thumbs, which is pretty much leaving a slit in the palm, then when you're done knitting the mitten you go back, pick up the stitches above and below the slit, and then knit your thumb from there.  It ends up being quite a bit more flat, and I'll admit it does look better on colorwork mittens, but it looks uncomfortable to me.  That is possibly because I have big thumb joints, however.  So anyway, I prefer the gusset thumb, which gives lots of room for my joints.  Another nice thing about this pattern is that the designer has so many tips and tricks and really explains everything in the pattern.  There were five pages of instructions, I think.  It's also one of the most popular patterns on Ravelry, so you can find lots of great tips there.
This pattern also included a chart for the mittens, which was really easy to follow, and told you where to put what colors.  I know that one would normally expect a chart of such caliber in a pattern for mittens like these, but I was really excited about having a good looking and easy to read chart.  You can do it with five contrast colors and one background color, or I did mine with one contrast and one background.  This pattern also involves picking up stitches and knitting a liner out of some fuzzy wuzzy yarn that will feel great on your hands after you're done the outer mitten.  More on why I didn't do that later.  So in short, I guess what I'm telling you is that if you haven't already gotten this pattern, do it.  It wouldn't be too hard for a beginner type knitter.  I wouldn't make it your first project, for sure, but that's mostly because of the thumb gusset, rather than the colorwork.  Knitting designs in colors is way easier than it looks, so I would encourage any and all of you to try it!  The thing to keep in mind while knitting with multiple colors is to not make the yarn that you are carrying in back of the yarn you are actually using at the time too tight.  That is a common problem with colorwork.

So now I'll tell you what I did with these mittens!  I used Plymouth Galway Worsted yarn, which is one of my favorites for 100% wool.  I was going for the small size, but when I did my gauge swatch I used a size 7 needle rather than the required size 3 needle, and I got the correct gauge (so I thought!), so I went up four sizes.  That's pretty normal for me, so I wasn't worried about that.  I did the cast on specified in the pattern, which took a long time but was worth it because it came out great.  I then followed the chart exactly for both mittens.  These went quickly, because I was so excited to see the next row of the pattern that I didn't want to stop.  I actually swapped the colors for the second mitten, which you can tell if you look closely: I used the pink for contrast color in one mitten, and blue for the main color, and vice versa for the other mitten.  So I got to the top of the first mitten, knit the second mitten, and then knit the thumbs.  Here's where my modification came in; I left out three rows of the thumb, because Chelsea has short thumbs and I was worried about it being too long.  So once I finished the thumbs of both mittens, I was WAY excited because they were so beautiful!  They did look slightly huge, but I wasn't worried because I was knitting the liner that would fit her hand perfectly.  I was a little depressed about having to go and knit two more mittens for liners, but that would just make them all the better, so I set them aside and did some other knitting first, since these were for Christmas and I was way ahead of schedule.  We had picked out Plymouth Mulberry Merino for the liner, which is a blend of silk and merino wool.  Merino is supposed to be the softest sheep wool around, and so far I believe it.  This yarn is silky soft and smooth, although it did tend to stick to itself while I was winding it.  Maybe that's normal for silk?  Anyway, so I decided for fun I would measure my gauge again on the finished product.  Turns out I got the gauge for the largest size, rather than the smaller.  So I thought, no big deal, they're 100% wool, I'll just felt them down a little bit to make them the right size, and then I'll knit the liner.  I had never actually felted anything before, but I thought how hard can it be?  I just toss them in the wash with hot water and bam!  Smaller mittens!  First I thought I should try handfelting, since I didn't want them to turn into baby mittens, so I filled up my dishbasin with hot water and a smidge of detergent.  I dunked the mittens in, and they got LARGER.  I rubbed them and agitated them, and they got larger still.  At this point I was panicking a little bit, and I had to make supper, so I threw them in the washing machine with two pairs of jeans with the idea to check them every 5 or 10 minutes.  I did that, and every 5 minutes that I checked them, they kept getting larger.  I put them through two full cycles, and they were not getting any smaller.  Then I pulled up a felting tutorial online, which said first of all that it's normal for the knits to get larger first (PHEW!) and to put the knitted items in a pillowcase.  I had read this elsewhere but thought it wouldn't make that much of a difference.  However, I tried it.  I threw the mittens in a pillowcase, and put a rubber band around the top so they wouldn't come out.  I left the two pairs of jeans in the washer, and started the cycle.  I then got involved with making supper and possibly watching tv, and forgot about the mittens, so neglected to check them at all during the cycle.  Once the washer was done, I pulled the mittens out of the pillowcase, and they had shrunk about 4 inches in length.  AH!  I took a deep breath, and pulled them on my hands.  Wet felted stuff doesn't really feel good on, and it smells really bad.  But I held my breath and tried them on, and they fit PERFECTLY.  I was so elated!  Although, since I had made the thumb a little shorter before I knew I was going to felt them, the thumb could have been longer.  So that's the one modification I made to this pattern, and I should have just let it alone.  So as I was dancing around my kitchen in wet, smelly mittens that were gorgeous and the perfect fit, I thought, "Gasp! There is now no room for that fuzzy liner!"  They fit so perfectly that introducing a liner would have made them way too tight.  I felt a little bad for Chelsea about that, but then I felt better because it meant instead of being 50% done the mittens, I was 100% done the mittens!  I then wrapped them up and gave them to Chelsea (as a general rule, I give Christmas presents when they're done, rather than at Christmas.  This is because they're usually finished after Christmas).  She had picked them out herself anyway, so there wasn't any surprise.  They fit her perfectly too!  She was very excited, and I hear has been wearing them around everywhere, trying to make other people excited about them too.  She's a good friend, and a great knitting model.  So Chelsea's mittens are done, and the liner yarn has been repurposed for a scarf for my sister, which might be done for Christmas but I haven't even started it yet so maybe not.  I remember one Christmas, I was knitting a scarf for my now husband, but then boyfriend, and I needed another skein.  I was going to his family's house Christmas night, and I recall wondering if Wal-Mart was open on Christmas so I could get another skein and knit all day to finish the scarf for Christmas night.  I was pretty young, and also obviously delusional.  But, nothing has changed except my age. :) 

So that was a super long post about one pair of mittens, sorry about that!  I've been knitting lots of other things too, and I'll share them soon, once I have pictures.  I'm feeling pretty good about my Christmas knitting and sewing deadlines, which means that karma is probably going to kick me in the teeth pretty soon.  Good thing I don't believe in karma.  Good luck with your crafting!

Wednesday, November 10, 2010

Thrummed mitten pattern

Hey everyone!  I just wanted to let you know that I am now a published pattern designer!  Whoo!  Really, I took three different mitten patterns and put them together, and now I'm pretending to be a pattern designer. :) I gave the three patterns credit, though, so I can't get in trouble, right?...
I put the pattern I used for the thrummed mittens up on ravelry.  If you're not on ravelry and you're a knitter or crocheter, you should be!  It's kind of like facebook, except everyone is a crafter.  You can look up patterns that you are thinking about doing (or currently doing), and get other people's notes and input on them.  It's pretty great.  If you are interested in viewing this pattern in pdf form, you'll need to sign in to ravelry (or create an account), and find me.  My user name is alexandy.  Then you can click on "my original designs" next to my name, and you'll see the pattern!  Alternatively, you can go under the patterns tab and search for "thrummed mittens with gusset thumb" and you should find it.  I would love to hear your thoughts if you try these.  They weren't that hard, just a little time consuming to make all those little puffy thrums.  Happy crafting!

Thursday, October 28, 2010

mittens galore!

Hi everyone!  I've been knitting mittens like crazy, and I wanted to share one finished pair with you.  As I mentioned before, I was making thrummed mittens for my mother in law.  Her grandmother, my husband's great grandmother, always knit their whole family double knit mittens, so they were warm, windproof, and just all around great.  As she is now 95 and has advanced arthritis in her hands, it's become my job to knit everyone mittens.  I obviously hate it. :)  So last year I knit my brother in law some mittens.  My husband and his brother both have big hands, so it was a large undertaking, to say the least.  Ever since I knit Gabe's mittens, my mother in law has wanted mittens as well.
Gabe's mittens, in all of their glory
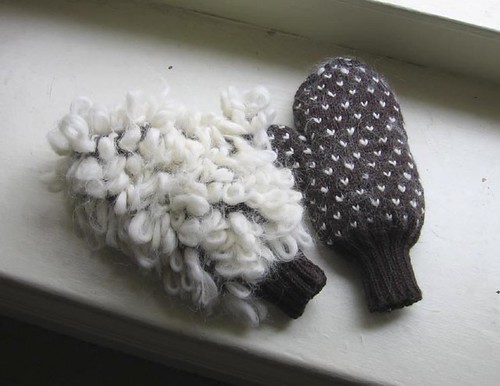
She always has cold cold hands (much like myself, actually), so I wanted to do something a little differently for her.  I had seen thrummed mittens before online, which are basically regular mittens with pieces of wool roving knit right into them.  They are very puffy, and quite cushy.  Here is a picture of my finished thrummed mittens
They are super duper cushy and warm.  I didn't take a picture of the inside of one, mostly because the cuff is tiny tiny (as you can see), and it was stretching the limits of the cuff to turn them inside out.  You can see a picture of a different knitter's pair here, and one of hers is inside out.  I put together a couple of different patterns for these mittens.  I've discovered that I have this sickness in which I cannot do any pattern exactly as written, I have to make it hard on myself and make some sort of change.  I was talking to my husband about a different pair of mittens that I'm knitting, and saying that I was doing the thumbs a different way so I had to think about it and then make it up as I was going, and he replied (with a slight hint of sarcasm, I might add!), "Well really, I'm shocked."  He knows me too well.  Isn't it great how you can't keep any secrets from the people you live with?  :)
Anyway, one pattern I used was the Yarn Harlot's thrummed mittens tutorial, which she did on her blog, and that tutorial can be found here.  I also used a pattern called Thrummed Mittens on 2 needles, which can be found here.  The Yarn Harlot's was knit in the round, so I followed the directions for that, but I didn't like the thumb on hers, so I used the thumb from the pattern for 2 needles (which were knit flat), adapting it for knitting in the round.  What I basically ended up doing was using my favorite mitten pattern and knitting in thrums every third stitch on every fourth row, offsetting them a stitch for every thrum round to get the spiral pattern.  I followed the instructions on the Yarn Harlot's blog for making a thrum and knitting it in.
All in all, these mittens turned out really great.  My mother in law loves them, and everyone who tried them on now wants a pair.  I informed everyone that there is a long waiting list, however.  :)
I also started the owl mittens and the fiddlehead mittens from the last post, and I'm really enjoying them.  I can't show you any pictures however, because my camera is on vacation in Guatemala.  The owl mittens are very cute, and I managed to finish one mitten in two days, mostly because I kept saying, "I'll do one more row so I can see the pattern!"  However, I picked gray yarn for the background, and it is beautiful yarn, but more suited to a lacy scarf than mittens.  I have decided to rip out the mitten I did and redo it in different gray yarn, and make a scarf for SOMEONE for Christmas out of the first gray I bought.   The fiddlehead mittens are turning out gorgeous, because Chelsea picked beautiful yarn (she always does, she has great taste), and a beautiful pattern.  She has been present for most of the progress on them, and she is very excited.  They are going pretty quickly, the only thing is that when I'm done the two mittens, I have to go back and knit a lining for each one.  Oh well, the things we do for our sisters!
So there is an update on what I've been knitting recently.  I'd love to hear what everyone out there is making, whether knitting, sewing, scrapbooking, or whatever else you do!  What are your homemade Christmas gifts?  Do you have anything you tend to make time and again because it's quick and easy?  Share your thoughts with us, and keep crafting! :)

Saturday, October 9, 2010

March's bag, and current projects

Hey everyone!  Sorry I didn't blog last week, we had a crazy day in the shop!  We didn't have very many votes for March's bag; in fact, there were only two!  As a result, we had to flip a coin to choose the bag for March.  The winner was the Be Green Market Bag from Paradiso Designs:
We have discussed our plan at the shop for the Bag of the Month, and decided that it's a lot of pressure for you to choose twelve bags in rapid succession.  So what we're going to do is start with these three bags, and we'll choose the rest of them.  If anyone has an objection to this, please let us know and we'll do something else.  Otherwise, we'll take care of choosing the rest of the bags and let you know what we'll be doing for each month as it's happening.

In other news, it's cold out!  What have you been doing for crafts lately?  Sylvia has been working on several different quilts.  One of them was a quiltalong that she and I did at my church this summer, the disappearing 9 patch.  Click here to view a post from a different blog about this pattern.  Hopefully she will share pictures soon, she's almost done putting the final borders on it!

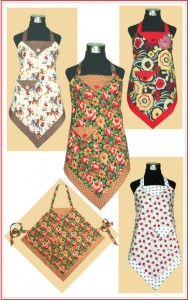
I've been working on lots of different things too.  I have made quite a few of the Four Corners Apron, which is really fast and fun.  It's also easy to make in a variety of different fabrics.

I also have several quilts I'm working on, most of which are gifts so I can't tell you about them yet. :) I did finally finish a quilt that was a gift for a wedding in 2008.  Yikes!  I'm also getting ready to revamp some furniture in our living room.  I made new cushions for a loveseat that was a gift from my parents when we got married, but they aren't really comfortable, and I figure that two and a half years of uncomfortable furniture is long enough, and it's time to redo it!  I'm hoping to use extra foam and polyester batting to make the cushions extra cushy and comfy.  Mostly, however, I've been knitting.  Right now I'm working on a pair of thrummed mittens for my mother-in-law.  This is what they will look like when they're finished (the left one is inside out):
They are super cushy.  I have the first one done except the thumb, and I'm working on the cuff for the second one.  They are actually quite quick to knit once you figure out what you're doing.  I'll give more details about yarn and patterns used when I'm done.

I also bought yarn this week for three more pairs of mittens for family members, my two sisters-in-law and my future sister-in-law.  They each picked out their own mittens, and these are what they chose:

These are for Chelsea, my future sister-in-law.  These are fine and dandy, but what you can't see is that there is a lining in these mittens that is another mitten, so basically I'm knitting four mittens for her.  It's a good thing I like her! :)  My sister-in-law Hannah chose these Owl mittens:
 
Her mittens will be made with a gray background and rosey pink owls, to match her jacket.  Claire chose mittens with flamingos on them:

 
Her mittens will have a black background with darker pink flamingos to match her jacket.  I also may or may not have promised my hairdresser and her daughter mittens as well (yes, I'm crazy too), so I'll be knitting mittens for awhile.  I'm really hoping to get some sewing in there too.  If I'm lucky.


What are you working on during this cold weather?  I'd like to say that cold weather makes me get back into crafting, but I never really stopped over the summer so that would be a falsehood.  Cold weather makes me want to stay home and craft all the time, however.  We would love to hear what you're working on, especially if you want to share pictures!  Stay warm, and we'll see you soon!